
English 

+86-158-5501-9595
leizhang112@126.com
leizhang112@126.com
No. 8, Lanzhou Road, Su-Chu Modern Industrial Park, Chuzhou City, Anhui Province


Views: 125 Author: Site Editor Publish Time: 2026-09-08 Origin: Site


Modern manufacturing relies heavily on shaping plastics rapidly and accurately. You see these formed parts everywhere today. They range from custom retail packaging to complex automotive dashboards. A Vacuum Thermoforming Machine sits at the very center of this production cycle. While the core process appears remarkably simple, scaling it brings significant hurdles. Moving from low-volume prototypes to high-volume production requires strict evaluation. Operators must balance heating consistency against complex tooling constraints. They also need to manage tight material tolerances to ensure structural quality. If you misunderstand these variables, you risk high scrap rates and failed production runs. This article details the actual mechanical steps behind vacuum forming. We will clarify strict mold design limitations you simply cannot ignore. Finally, we provide a clear framework for evaluating various machine tiers. By the end, you will know exactly how to match machine capabilities directly to your specific operational needs.
A vacuum thermoforming machine heats plastic sheet to a pliable forming temperature, applies it over a mold, and uses a vacuum to pull the material tight against the tooling.
Machine viability depends heavily on mold design rules; ignoring draft angles or improper vent hole placement guarantees production failure regardless of machine quality.
Evaluating a machine requires assessing heating zone control, maximum forming area, and automation levels, which dictate whether a unit is fit for lab prototyping or industrial runs.
Hidden costs lie in tooling and material waste, making material compatibility (e.g., HIPS, ABS, PETG) a primary shortlisting filter.
Understanding the mechanical sequence is crucial for diagnosing production errors. Each phase relies on precise timing and temperature control. If one step fails, the final plastic part will suffer.
The process begins by securing a flat plastic sheet. You must lock this sheet into a rigid frame. This frame prevents the plastic from shrinking inward during the intense heating cycle. In real operational settings, clamping mechanisms make or break the process. Poor clamping leads to the material pulling out of the frame. This slippage causes uneven draw ratios and unpredictable wall thicknesses. Industrial setups use automated pneumatic clamps to maintain consistent tension across the entire sheet.
Once clamped, the machine exposes the material to radiant heaters. The plastic must reach its specific glass transition temperature. At this exact point, the rigid sheet becomes highly pliable. Evaluation criteria for machines often center here. Entry-level units rely on single-zone heating. This basic approach works for small areas but often causes localized webbing on larger parts. In contrast, advanced systems use multi-zone quartz or ceramic heaters. Multi-zone control lets you direct varying heat levels to specific sections of the plastic. This prevents premature thinning in deep-draw areas.
After the plastic reaches the correct temperature, the forming phase triggers. The machine raises the platen, which holds the mold, upward. It pushes the mold directly into the draped, sagging material. Immediately, the system activates a powerful vacuum pump. This pump rapidly evacuates all the air trapped between the hot sheet and the mold surface. The sudden removal of air forces atmospheric pressure to push the plastic tightly into every contour of the tool. A strong, instantaneous vacuum is vital for capturing fine details.
The newly shaped part remains hot and malleable. It must cool before you can remove it. Machines use integrated cooling fans or chilled air jets to drop the temperature quickly. This rapid cooling sets the plastic structure permanently. Once the part reaches a safe handling temperature, the release phase begins. The machine applies positive air pressure, often called blow-back, through the vacuum lines. This brief burst of air gently pushes the formed part off the mold. It ensures safe demolding without damaging delicate vertical walls.
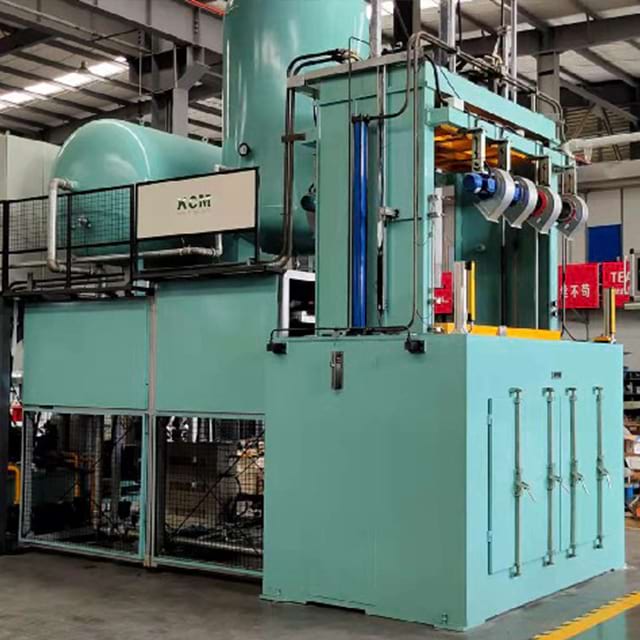
Your production success relies entirely on your mold design. A high-end Vacuum Thermoforming Machine cannot fix a poorly designed tool. You must choose the right mold materials and apply strict design parameters.
Choosing the right mold material balances upfront capital against expected production volume. Each material serves a distinct lifecycle phase.
Wood and MDF: These materials offer extremely low costs. You can carve them quickly for early prototyping. However, they possess low durability. They degrade rapidly under high heat and continuous vacuum pressure.
3D Printed Tooling (SLA/FDM): Additive manufacturing provides high precision and rapid turnaround times. This makes it perfect for mid-volume runs. You must use temperature-resistant resins or filaments. Standard PLA will melt or deform after just a few heating cycles.
Machined Aluminum: Aluminum carries a high upfront cost. It requires CNC machining and finishing. Yet, it is absolutely essential for high-volume, repeatable industrial production. Aluminum dissipates heat rapidly, drastically reducing cycle times between pulls.
You cannot bypass physics when designing thermoforming molds. Ignoring these three parameters guarantees production failure.
Draft Angles: Vertical walls cause severe friction during release. You must include mandatory 3° to 5° tapers on all vertical faces. This draft angle allows smooth part ejection. Without it, the shrinking plastic will lock onto the mold, destroying both the part and potentially the tool.
Vent Holes: Air will get trapped in deep recesses or sharp corners. You must place strategic sub-millimeter vent holes in these low spots. These holes give the vacuum a path to pull trapped air through the mold. Proper venting ensures the plastic captures every sharp detail.
Draw Ratios: This metric compares a part's height to its width. You face strict limitations on how deep you can stretch the plastic. Excessive depth causes severe material thinning at the base. You must calculate draw ratios early to avoid weak, unusable final products.
The market offers diverse equipment tiers to match different production volumes. Selecting the wrong category strains your budget or limits your output capacity.
These compact units define accessibility. Their primary success criteria include a small footprint and standard 110V/220V power compatibility. They usually feature basic timer controls instead of complex digital sensors. However, they carry strict limitations. The maximum forming area typically stays under 18x18 inches. Operators must handle clamping, heating, and demolding manually. They almost exclusively use single-zone heating. These desktop models are best for educators, DIY makers, and low-fidelity proof-of-concept models.
Stepping up, semi-automatic units bridge the gap between labs and factory floors. Their success criteria include automated pneumatic platens and sophisticated multi-zone heating. They often feature digital touchscreen interfaces for recipe storage. This allows operators to save exact heating times for specific plastics. Their main limitation is labor. The machine still requires an operator's physical presence to load sheets and manually demold parts. They remain the best choice for R&D labs, design agencies, and low-volume custom packaging runs.
Industrial machines handle mass production. Their success criteria revolve around roll-fed automation. Instead of single sheets, they pull material directly from massive plastic spools. They include plug-assist capabilities for extreme deep draws. They also feature integrated robotic trimming and tight tolerance control. The limitations involve high capital expenditure and massive footprints. They require dedicated floor space, heavy 3-phase power, and highly specialized operator training. These systems are best for Tier-1 automotive suppliers and high-volume medical tray manufacturers.
Table 1: Machine Tier Comparison Summary
Machine Tier | Heating Control | Operation Level | Ideal Use Case | Power Requirement |
|---|---|---|---|---|
Desktop / Maker | Single-zone | Fully Manual | Education, DIY, Basic Prototypes | 110V / 220V Standard |
Semi-Automatic | Multi-zone | Pneumatic / Manual Load | R&D, Design Agencies, Low-Volume | 220V Single or 3-Phase |
Industrial B2B | Multi-zone / Double-sided | Fully Automated / Roll-fed | Tier-1 Suppliers, Mass Production | 3-Phase Industrial |
Your choice of plastic dictates your machine settings. Not all resins behave the same way under heat. Understanding material behavior prevents unnecessary material waste.
Industry relies on a few core thermoplastics. Each brings specific strengths to the final product.
HIPS (High Impact Polystyrene): This is the easiest material to form. It forgives minor temperature variations. It carries a low cost, making it the absolute standard for prototyping and disposable packaging.
ABS (Acrylonitrile Butadiene Styrene): ABS provides much higher impact resistance and rigid strength. However, it is highly hygroscopic. It absorbs moisture from the air. You require strict moisture control, usually pre-drying the sheets in an oven. Failure to dry ABS results in severe surface blistering during heating.
PETG / Polycarbonate: These materials offer distinct optical clarity. They are highly capable of meeting FDA and medical compliance standards. They demand highly precise temperature control. If overheated, PETG becomes brittle or cloudy. Polycarbonate requires intense heat and highly rigid molds.
Starting material gauge heavily dictates your machine choice. Desktop units lack the heating power to penetrate thick sheets. They usually max out around 1.5mm to 2mm thicknesses. Industrial machines employ double-sided heaters. This allows them to quickly soften heavy-gauge plastics measuring 6mm or thicker.
You must also account for standard thinning during the stretch phase. When a flat sheet stretches over a tall mold, it loses thickness. You should expect a 20% to 40% reduction in wall thickness on vertical faces. Engineers must calculate this loss beforehand. If a finished part requires a 2mm thick wall, you might need to start with a 3.5mm flat sheet.
Even seasoned operators face daily production defects. Recognizing these visual defects quickly helps you adjust machine parameters before wasting entire material batches.
Webbing occurs when excess plastic folds over itself. It looks like a sharp crease or wrinkle on the finished part. The primary causes include overheating the material or placing multiple molds too close together on the platen. Insufficient initial vacuum flow also contributes. To fix this, you must adjust the heater zoning to cool specific areas slightly. You can also add physical constraints, known as webbing blocks, to the mold bed. These blocks pull excess material away from the primary part.
Sometimes parts emerge with soft, rounded corners instead of sharp edges. This incomplete detail capture usually means the material was too cold when forming started. It can also indicate inadequate vent holes trapping air in the corners. Finally, an undersized vacuum pump lacking sudden surge capacity will fail to snap the plastic tight against the mold. Increasing heating times and drilling extra vent holes usually resolves this issue.
Blistering ruins the structural integrity and aesthetic finish of a part. The risk occurs primarily with hygroscopic materials like ABS or Polycarbonate. The absorbed water actually boils inside the plastic during the intense heating phase. This boiling creates tiny trapped steam bubbles. The mitigation strategy requires implementing strict standard operating procedures (SOPs). You must mandate material pre-drying cycles. You should also ensure humidity-controlled storage for raw plastic stock.
Choosing a Vacuum Thermoforming Machine is always a balancing act. You must weigh maximum forming area against heating control precision. You also need to align equipment costs with your anticipated production volume. Your shortlisting logic should start simply. First, define the maximum part size and the required material thickness. Next, evaluate your tooling capabilities honestly. Decide whether you will use in-house 3D printing or outsource CNC aluminum machining. Finally, select a machine tier that aligns with your capital expenditure budget and operational bandwidth.
Your next steps should involve hands-on verification. Request sample pulls from potential vendors using your exact mold geometries. Evaluate their proprietary software interface for ease of use. Lastly, verify your facility requirements immediately. Ensure you have the adequate compressed air supply and necessary power phases installed before finalizing any machine purchase.
A: Vacuum forming relies solely on atmospheric pressure. It removes air from under the plastic, letting normal air pressure push it down. Pressure forming adds positive, highly compressed downward air pressure on top of the sheet. This extra force drives the plastic into microscopic mold textures, creating much sharper, injection-molded-like details.
A: Yes, if you manufacture deep-draw parts. A plug-assist is a mechanical arm that physically pushes the heated plastic down into a deep mold cavity before the vacuum activates. This prevents severe material thinning at the base. Without it, deep parts often fail basic QA/QC structural standards.
A: Yes, it is highly common for rapid prototyping. However, you must select the right materials. Standard PLA melts under the radiant heaters. You must use temperature-resistant SLA resins, high-temp FDM filaments, or specialized epoxy coatings to ensure the mold withstands forming temperatures without deforming.
A: Maximum thickness varies strictly by machine tier. Desktop units usually cap out at ≤2mm because they lack sufficient heating power. In contrast, industrial machines feature powerful double-sided heating arrays. These heavy-duty systems can easily manage high-gauge materials ranging from 6mm up to 10mm thick.


